Step 3: Displaying detail information
Next, we display more detailed information of a business partner in two pages: DetailPage and AddressPage. These pages should not be a part of the MainView, but belong to a new view.
-
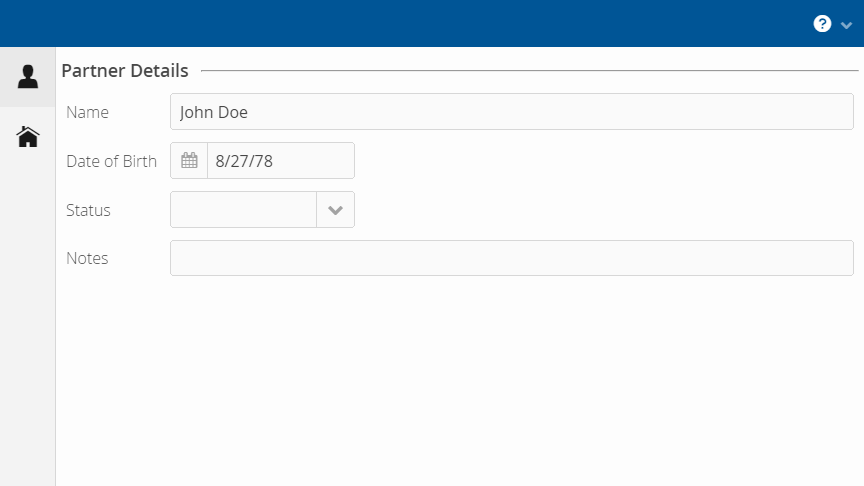
DetailPagecontains general information on the business partner such as the name and date of birth.
Figure 1. DetailPage -
AddressPagedisplays all addresses of a partner in a table.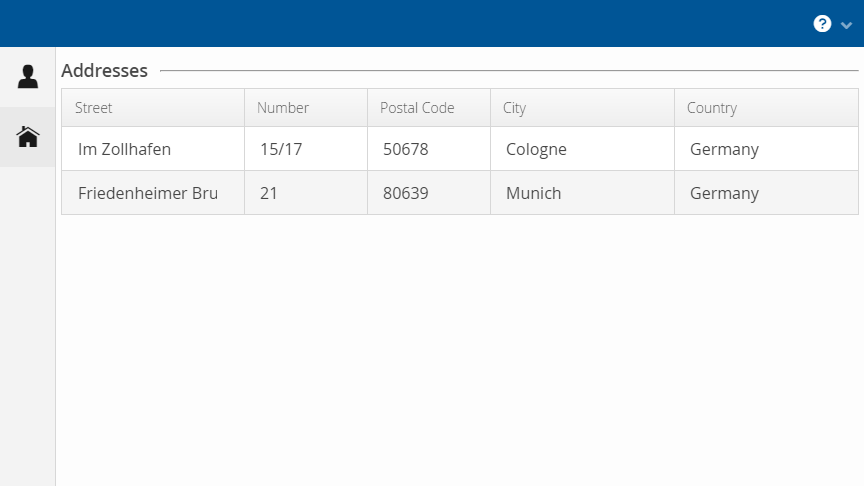 Figure 2. AddressPage
Detail page
The first page we want to show in the PartnerDetailView is the DetailPage that contains the PartnerDetailsSectionPmo. We create the PartnerDetailsSectionPmo with the caption "Partner Details" the same way as the SearchSectionPmo and define UI Elements for the name and date of birth of the partner as well as their status and some notes. Therefore, we need a text field, a date field, a combo box and a text area (in this order). After that, we implement the corresponding DetailPage. We do this in the same fashion as we’ve implemented the SearchPage. The DetailPage is even simpler since we don’t have to deal with the expand ratio.
Display detail page in PartnerDetailView
As all the pages should be displayed in a completely new view, we have to first implement the view to include the pages. We call this new view PartnerDetailView.
Overall, PartnerDetailView should show a sidebar layout with the two pages as sidebar sheets. Thus, we create a new class PartnerDetailView that extends from the super class SidebarLayout. In addition, PartnerDetailView implements the interface View just like the MainView. Finally, we initialize a variable of type BusinessPartnerRepository in its constructor and annotate the constructor with @Autowired.
PartnerDetailView.java
    private BusinessPartnerRepository repository;

    @Autowired
    public PartnerDetailView(BusinessPartnerRepository repository) {
        this.repository = repository;
    }
The main entry point of any view class is the enter method. In this case, we obtain a partner’s ID as a string from the event delivered to the enter method, reformat it into a UUID element and fetch the corresponding business partner using the getBusinessPartner method. After that we add the DetailPage as a SidebarSheet.
PartnerDetailView.java
    @Override
    public void enter(ViewChangeEvent event) {
        String viewParameters = event.getParameters();
        UUID id = UUID.fromString(viewParameters);
        BusinessPartner partner = repository.getBusinessPartner(id);
        addSheets(new SidebarSheet(
                VaadinIcons.USER, "Details", createDetailPage(partner)));
    }
We implement the createDetailPage method as below.
PartnerDetailView.java
    private DetailPage createDetailPage(BusinessPartner partner) {
        DetailPage detailPage = new DetailPage(partner, repository);
        detailPage.createContent();
        return detailPage;
    }
Now the new view is implemented, it has to be connected to the "detail" button in the search result table. In step 2, we already called the empty method showPartnerDetails of our MainView when the user clicks on the button. Thus, the only thing left to do now is to implement this method.
As argument it takes a BusinessPartner and navigates to the PartnerDetailView. Our PartnerDetailView URL must contain the partner’s ID, so we add it to the URL within the navigateTo method.
MainView.java
    public void showPartnerDetails(BusinessPartner partner) {
        LinkkiUi.getCurrentNavigator().navigateTo(
                PartnerDetailView.NAME + "/" + partner.getUuid().toString());
    }
Running the application now, when clicking a detail button, we can see the PartnerDetailView with the sidebar and the DetailPage with its corresponding sidebar sheet button. In order to see both pages, we still have to implement the AddressPage.
Address page
The AddressPage displays the partner’s addresses. As each partner has a list of addresses, we need to create a table showing them. That means we implement a row PMO and a table Pmo. The AddressRowPmo uses an Address as the @ModelObject and fully consists of text fields as UI elements. The AddressTablePmo has SimpleTablePmo<Address, AddressRowPmo> as parent class. The constructor and the createRow method can be implemented the same way as in SearchResultsTablePmo.
We implement the AddressPage that creates and adds the AddressTablePmo just like DetailPage. Now we can add the new page to the sidebar in the enter method of PartnerDetailView by changing the method addSheet to addSheets as shown below.
PartnerDetailView.java
    public void enter(ViewChangeEvent event) {
            ...
            addSheets(
                    new SidebarSheet(VaadinIcons.USER, "Details",
                            createDetailPage(partner)),
                    new SidebarSheet(VaadinIcons.HOME, "Addresses",
                            createAddressPage(partner)));
    }
The create methods are implemented the same way as for the DetailPage.
You might have realized that it is currently possible to edit every piece of information directly in the display fields at this stage of the tutorial. This is not intended behavior, as we cannot expect the application to persist the data to a database each time a field is edited. We will fix this later when we implement special behavior that sets the fields of most PMOs as read-only. Adding and editing information will then be handled by dialogs that properly persist the modifications after the editing is done.