Step 6: Implementing add/edit buttons and dialogs
Now that the user can delete addresses, we will create buttons to make it possible to add new ones. When adding a new address, the user is prompted to enter the address data in a dialog. The entry is then added after the user has finished editing by clicking on the OK button of the dialog.
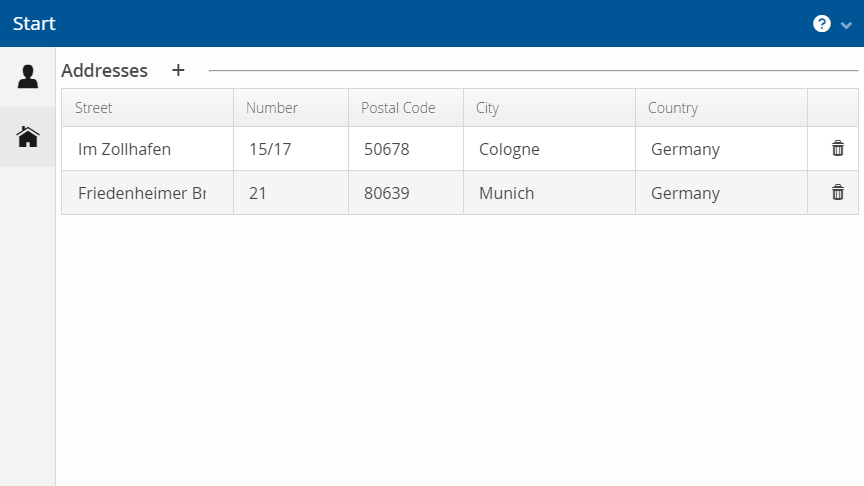
Figure 1. Address table with add button in table header
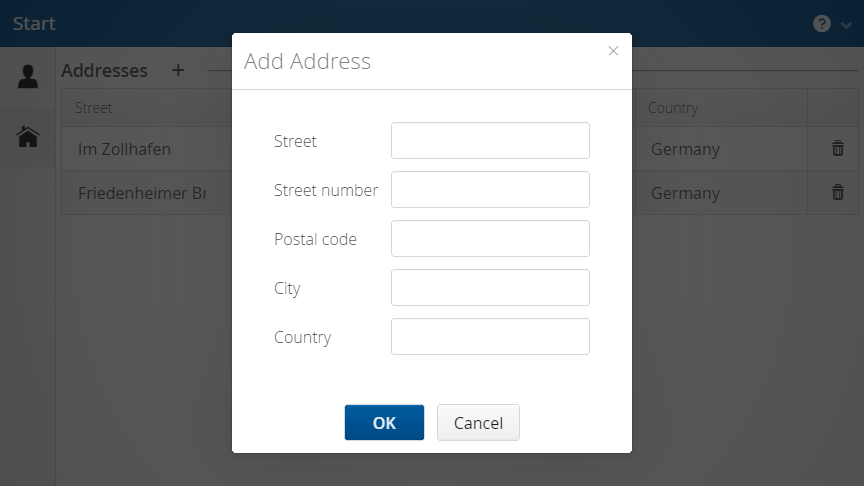
Figure 2. Add Address dialog
To edit an address row, we will reuse the same dialog.
Add button in table caption
We start with the add button for our addresses. As we want the button to be next to the headline of the corresponding section, we need to implement it in the AddressTablePmo. The method creating the button is called getAddItemButtonPmo and overrides the method in the parent class SimpleTablePmo from which we already inherit. We simply return a matching newAddButton that takes a handler.
AddressTablePmo.java
    @Override
    public Optional<ButtonPmo> getAddItemButtonPmo() {
        return Optional.of(ButtonPmoBuilder.newAddButton(createHandler));
    }
Implementing the dialog
Now we switch to the AddressPage to implement the dialog. First we implement the handler that is used in the getAddItemButtonPmo method in AddressTablePmo and pass it to the AddressTablePmo class. For that, we introduce a new method createNewAddress(BusinessPartner) that does not return anything. We then pass () → createNewAddress(BusinessPartner) as the create handler to the constructor call of AddressTablePmo.
In the created method createNewAddress, a new address should be instantiated which is then shown in a dialog to be edited. In linkki a dialog is constructed by writing a PMO class with the UI Elements that should be displayed. Thus, we have to write a PMO class AddressDialogPmo. Except for the delete button, it uses the same UI elements as AddressRowPmo.
With the dialog PMO implemented, we can complete the createNewAddress method. We construct a new OkCancelDialog using the PmoBasedDialogFactory. The PmoBasedDialogFactory takes a name, a PMO object and a handler that will be called when OK is clicked. There are three steps that have to be done after the changes in the dialog are submitted:
-
Add the newly created address to the partner
-
Persist the partner in the repository
-
Update the UI to show the new changes
In order to create this multi-step handler, we chain the handlers for adding addresses, saving addresses and updating the UI using the andThen method. Finally, we supply the AddressDialogPmo we created before to the PmoBasedDialogFactory. After having created the dialog, we set the width of the dialog and open it.
AddressPage.java
    public void createNewAddress() {
        Address address = new Address();
        AddressDialogPmo dialogPmo = new AddressDialogPmo(address);
        Handler addHandler = () -> partner.addAddress(address);
        Handler saveHandler = () -> repository.saveBusinessPartner(partner);

        OkCancelDialog addressDialog =
                new PmoBasedDialogFactory()
                        .newOkCancelDialog("Add Address",
                                addHandler.andThen(saveHandler)
                                        .andThen(this::updateUI),
                                dialogPmo);
        addressDialog.setWidth("25em");
        addressDialog.open();
    }

    public void updateUI() {
        getBindingContext().uiUpdated();
    }
Edit button and dialog for DetailPage
On the DetailPage, we want an edit button instead of an add button displayed next to the headline of the section. We will have PartnerDetailsSectionPmo implement the interface PresentationModelObject and override the getEditButtonPmo method. Here we can use the ButtonPmoBuilder in the same way as in AddressTablePmo to create a new edit button.
The dialog works almost the same. Since we have a self-made repository that reveals the actual model objects, we have to create a copy of the object, so that we change the model objects only when the user clicks OK.
DetailPage.java
    public void editPartner() {
        BusinessPartner businessPartner = new BusinessPartner(
                partner.getName(), partner.getDateOfBirth(),
                partner.getStatus());

        Handler copyPartnerProperties =
                () -> businessPartner.copyPropertiesTo(partner);
        Handler updateUi = this::updateUI;
        Handler savePartner = () -> repository.saveBusinessPartner(partner);
        Handler okHandler =
                copyPartnerProperties.andThen(savePartner).andThen(updateUi);

        OkCancelDialog dialog = new PmoBasedDialogFactory()
                .newOkCancelDialog("Edit Partner", okHandler,
                                   new PartnerDetailsDialogPmo(businessPartner));
        dialog.setWidth("25em");
        dialog.open();
    }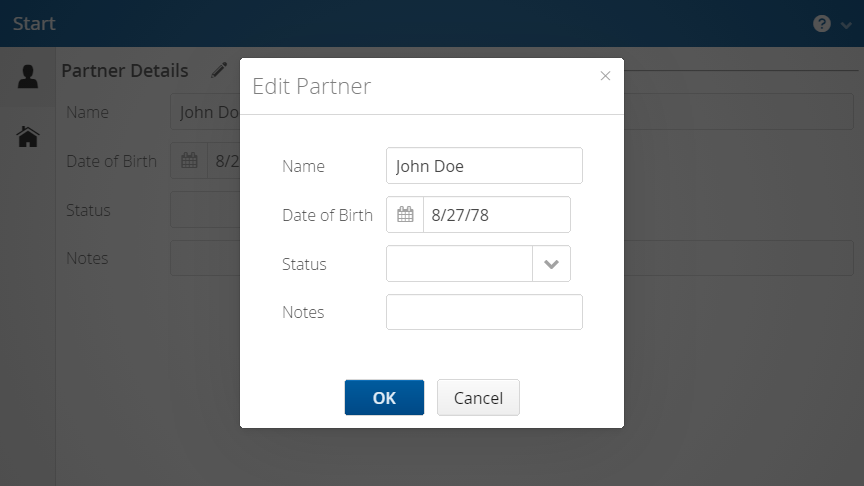
Figure 3. Edit Partner dialog
Pass partner repository to the pages
In the PartnerDetailView, we now need to change the page creation methods so they pass the repository into our pages.