Step 7: Adding a menu item to create new partners
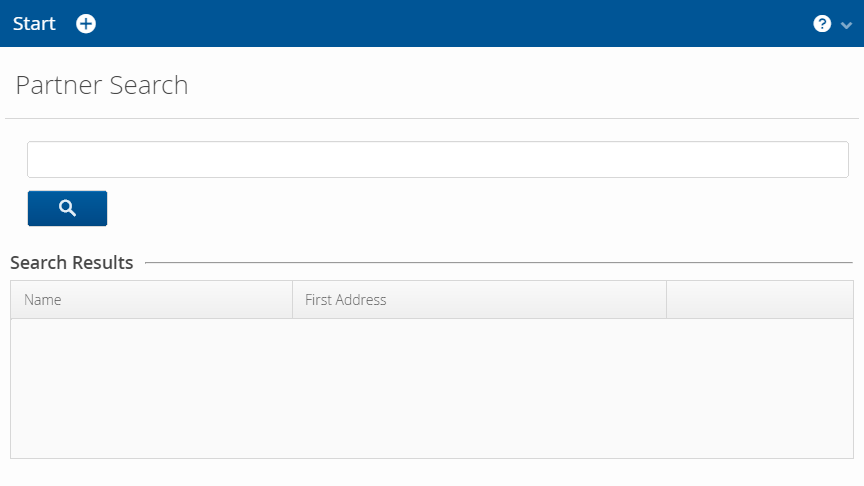
One major functionality that is still missing is the ability to create new partners. As mentioned before, we want to add a second menu bar item in the application menu for this task. This menu item should create a new business partner and navigate to the DetailPage where their detail information is displayed.
Figure 1. Main view with button to add a new partner
The implementation of this item works in almost the same way as the implementation of the StartMenuItem. The AddPartnerMenuItem will create a new business partner after having prompted the user to enter the partner data, and then navigate to their DetailPage.
AddPartnerMenuItem.java
    @Override
    protected MenuItem internalCreateItem(ApplicationMenu menu) {
        return menu.addItem("", VaadinIcons.PLUS_CIRCLE,
                e -> createNewPartner());
    }
Creating an ApplicationMenuItemDefinition
Just as StartMenuItem, we need to create a new class AddPartnerMenuItem that extends ApplicationMenuItemDefinition. Since we need to create a new partner in the repository, we have to define a class variable of type BusinessPartnerRepository which is set in the constructor. In internalCreateItem, we add a new item to the ApplicationMenu with no caption, but a plus button instead. As a handler, we use a method reference to the new method createNewPartner.
createNewPartner should open an edit dialog and then lead us to the matching DetailPage. This works just like when creating a new address. The showDetailView handler is responsible for navigating to the new partner’s detail view after saving them in our repository.
AddPartnerMenuItem.java
    public void createNewPartner() {
        BusinessPartner partner = new BusinessPartner();
        PartnerDetailsDialogPmo dialogPmo =
                new PartnerDetailsDialogPmo(partner);

        ValidationService validationService = () -> partner.validate();
        PmoBasedDialogFactory dialogFactory =
                new PmoBasedDialogFactory(validationService);

        Handler saveHandler = () -> repository.saveBusinessPartner(partner);
        Handler showDetailView = () -> LinkkiUi.getCurrentNavigator()
                .navigateTo(PartnerDetailView.NAME + "/"
                        + partner.getUuid());

        OkCancelDialog partnerDialog = dialogFactory.newOkCancelDialog(
                "Create a new Partner",
                saveHandler.andThen(showDetailView),
                dialogPmo);
        partnerDialog.setWidth("25em");
        partnerDialog.open();
    }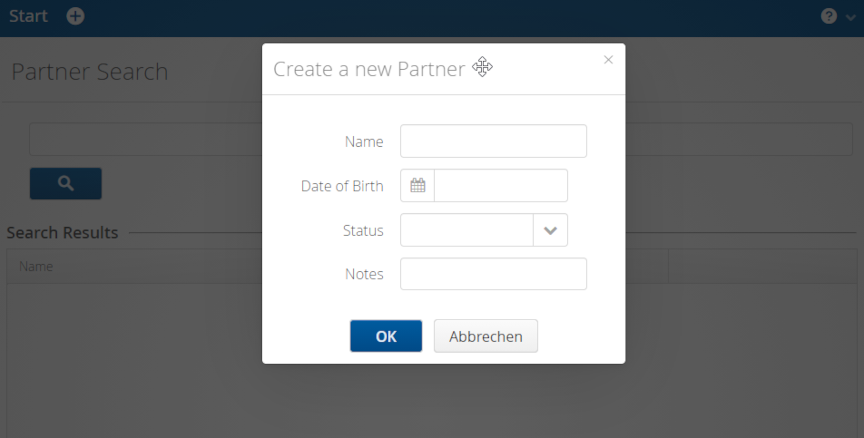
Figure 2. Create partner dialog
Add menu item to the application
Finally, we add the item to the Sequence of our menu bar in the BusinessPartnerApplicationConfig.
Since we need a BusinessPartnerRepository to construct our new AddPartnerMenuItem we inject it into our configuration class.
BusinessPartnerApplicationConfig.java
@Configuration
public class BusinessPartnerApplicationConfig implements ApplicationConfig {

    private final BusinessPartnerRepository repository;

    @Autowired
    public BusinessPartnerApplicationConfig(
            BusinessPartnerRepository repository) {
        this.repository = repository;
    }

    @Override
    public Sequence<ApplicationMenuItemDefinition> getMenuItemDefinitions() {
        return Sequence.of(new StartMenuItem(),
                new AddPartnerMenuItem(repository));
    }
We also add the @Configuration annotation to our BusinessPartnerApplicationConfig, because we now need to inject it in the BusinessPartnerUI.
BusinessPartnerUI.java
    @Autowired
    public BusinessPartnerUI(SpringNavigator springNavigator,
            ApplicationConfig applicationConfig) {
        super(applicationConfig);
        this.springNavigator = springNavigator;
    }
Notify gracefully about nonexistent partner IDs
The PartnerDetailView works by getting the ID of the partner as a parameter extracted from the URL path. Until now, if a nonexistent ID is entered in the URL, the user gets an error dialog with a very technical stack trace. To notify the user about the error in a nicer way, we want to show a friendly notification instead.
In the PartnerDetailView, we check the received partner against null before adding the sheets. In the case of partner == null we display a notification that this partner does not exist.
PartnerDetailView.java
public void enter(ViewChangeEvent event) {
            ...
            Notification.show("There is no partner with ID " + id
                    + " in the repository.");
            ...
}
Figure 3. Error notification