
mvn archetype:generate \
-DarchetypeGroupId=org.linkki-framework.archetypes \
-DarchetypeArtifactId=linkki-archetype-spring-application-vaadin-flow \
-DarchetypeVersion=2.5.1Project setup
Project generation
To build the basic frame of the project, you generate a new Maven project using the linkki Spring archetype. There are two ways to do that:
1. Generating the project from the command line
You can generate the project using Maven on the command line. In order to do that, you execute the command
You are prompted to choose several values for the project. The value for ApplicationName should be set to "BusinessPartner". You can choose freely which group ID, artifact ID, version and package name you want to use.
Once the generation is completed, you can import the new project into your favored IDE.
2. Generating the project in Eclipse
Alternatively, when using Eclipse you can use the wizard for new Maven Projects. Start the wizard by selecting File - New - Project - Maven - Maven Project. When selecting the archetype, choose
-
Group Id
org.linkki-framework.archetypes -
Artifact Id
linkki-archetype-spring-application-vaadin-flowand -
Version
2.5.1.
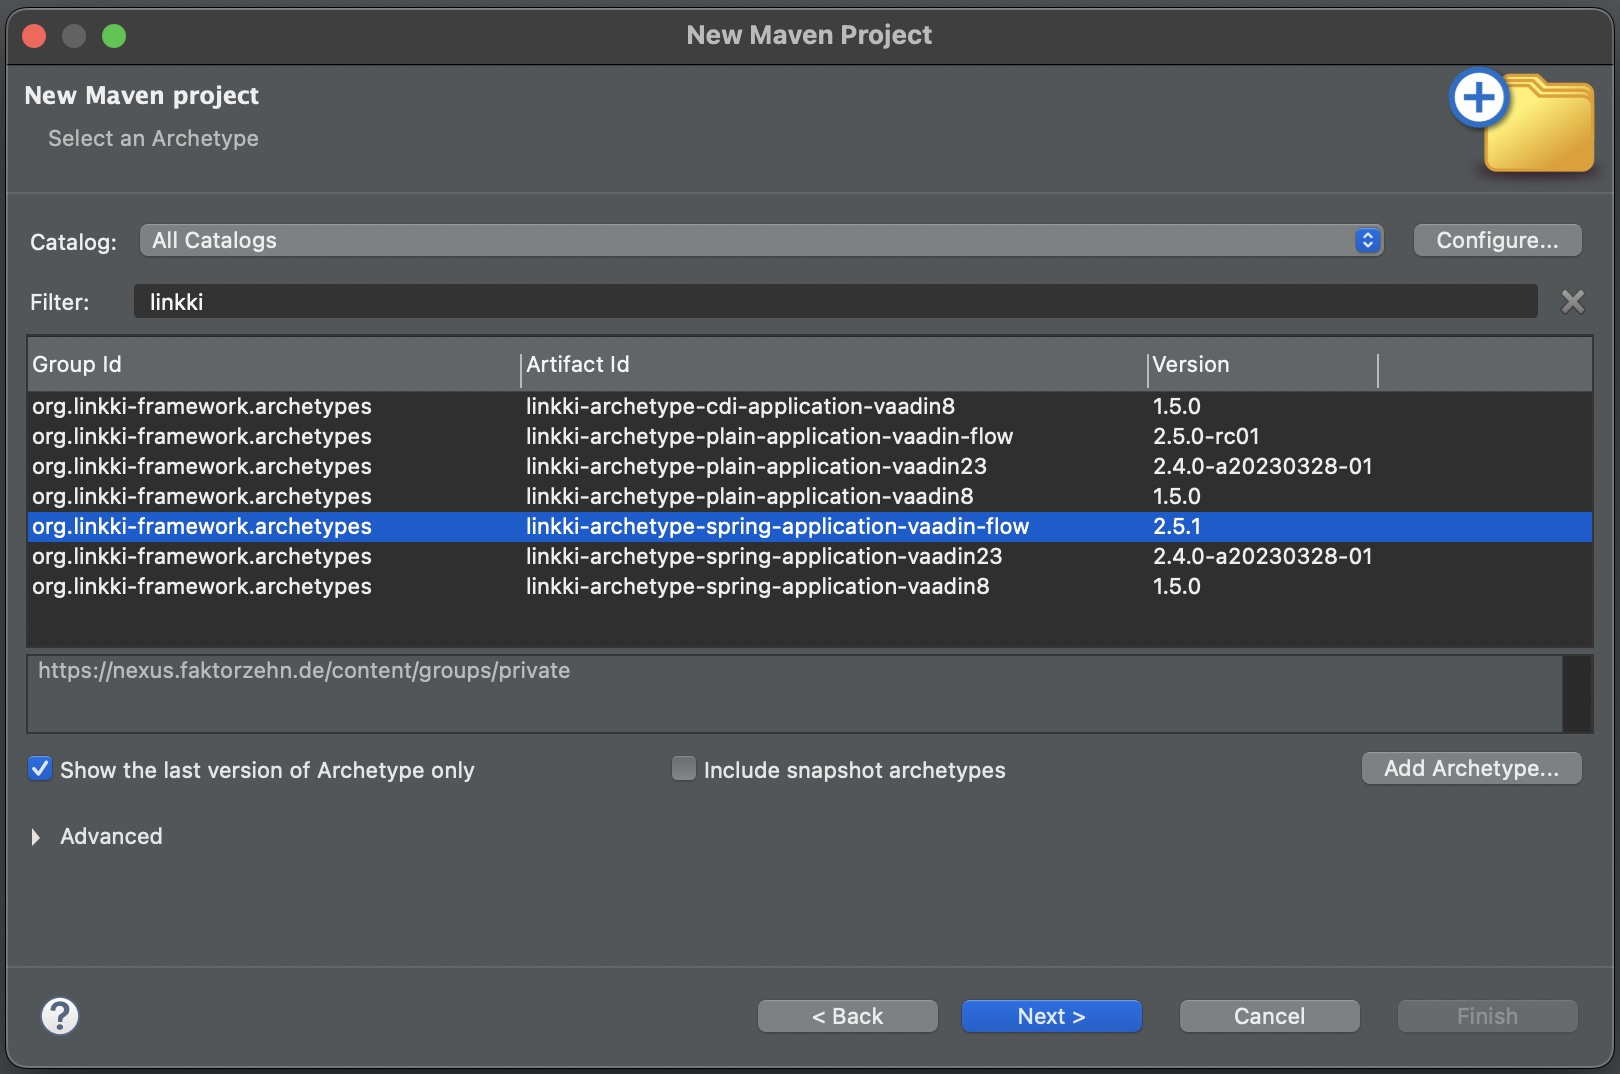
Figure 1. Selecting the archetype
In the next step, set the project’s group ID, artifact ID, version and package name however you want. The property ApplicationName should be set to "BusinessPartner".
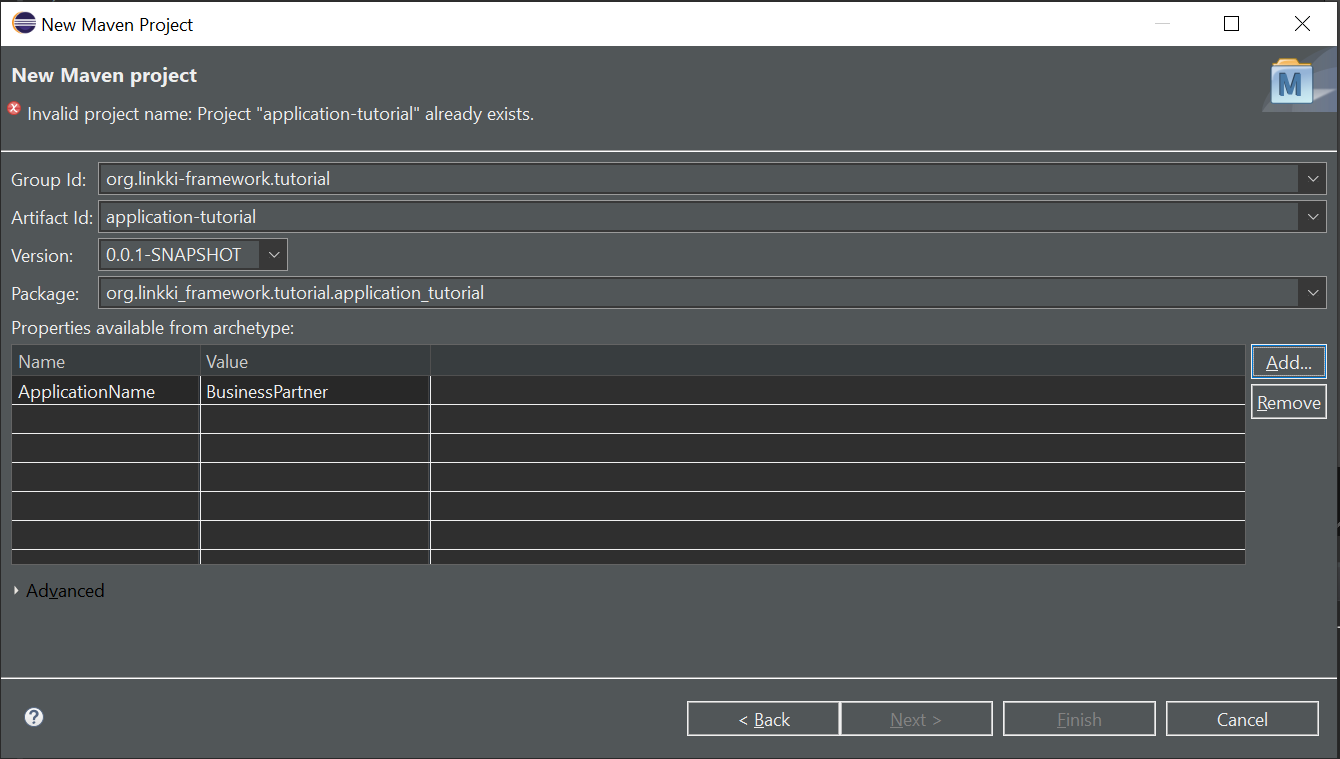
Figure 2. Generate project in Eclipse
3. Generating the project in IntelliJ
Alternatively, when using IntelliJ you can use the wizard for new Maven Projects.
Start the wizard by selecting File - New - Project. Select the Maven Archetype Generator, give it a name and set the Catalog to Maven Central. In the Archetype selectbox you can search for linkki and select the appropriate Archetype from the list. Finally, choose the version and set the Property ApplicationName to "BusinessPartner".

Figure 3. Generate project in IntelliJ
Initial project structure
The created project contains a HelloPmo class, a BusinessPartnerPage, a BusinessPartnerView that you will modify later and fundamental units for your application such as the BusinessPartnerConfig, the BusinessPartnerInfo, the BusinessPartnerLayout and the BusinessPartner.
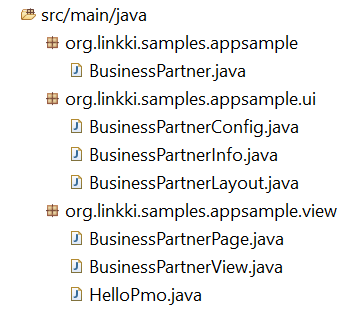
Figure 4. Structure of the generated project
BusinessPartner-
The
BusinessPartnercontains the main method that runs the application. BusinessPartnerView-
This view will show the browser window containing the search bar and the search result table you will implement later.
BusinessPartnerInfo-
This class contains general information about your application such as its name and copyright.
BusinessPartnerConfig-
The
BusinessPartnerConfigconfigures the main aspects of the application such as the information stored inBusinessPartnerInfo, the header and the footer. BusinessPartnerLayout-
All views will be displayed in the
BusinessPartnerLayout, which is a custom layout configured withBusinessPartnerConfig. It will therefore e.g. surround the views with a header and a footer.
To get a better understanding of the classes this archetype creates, refer to the section Application Layout in the chapter Application Framework of the linkki Documentation.
Example application
The project as-is is already a runnable web application. Try starting the BusinessPartner as a Java application. Once startup is completed, open the URL http://localhost:8080/ in a browser and you should see the example application below.
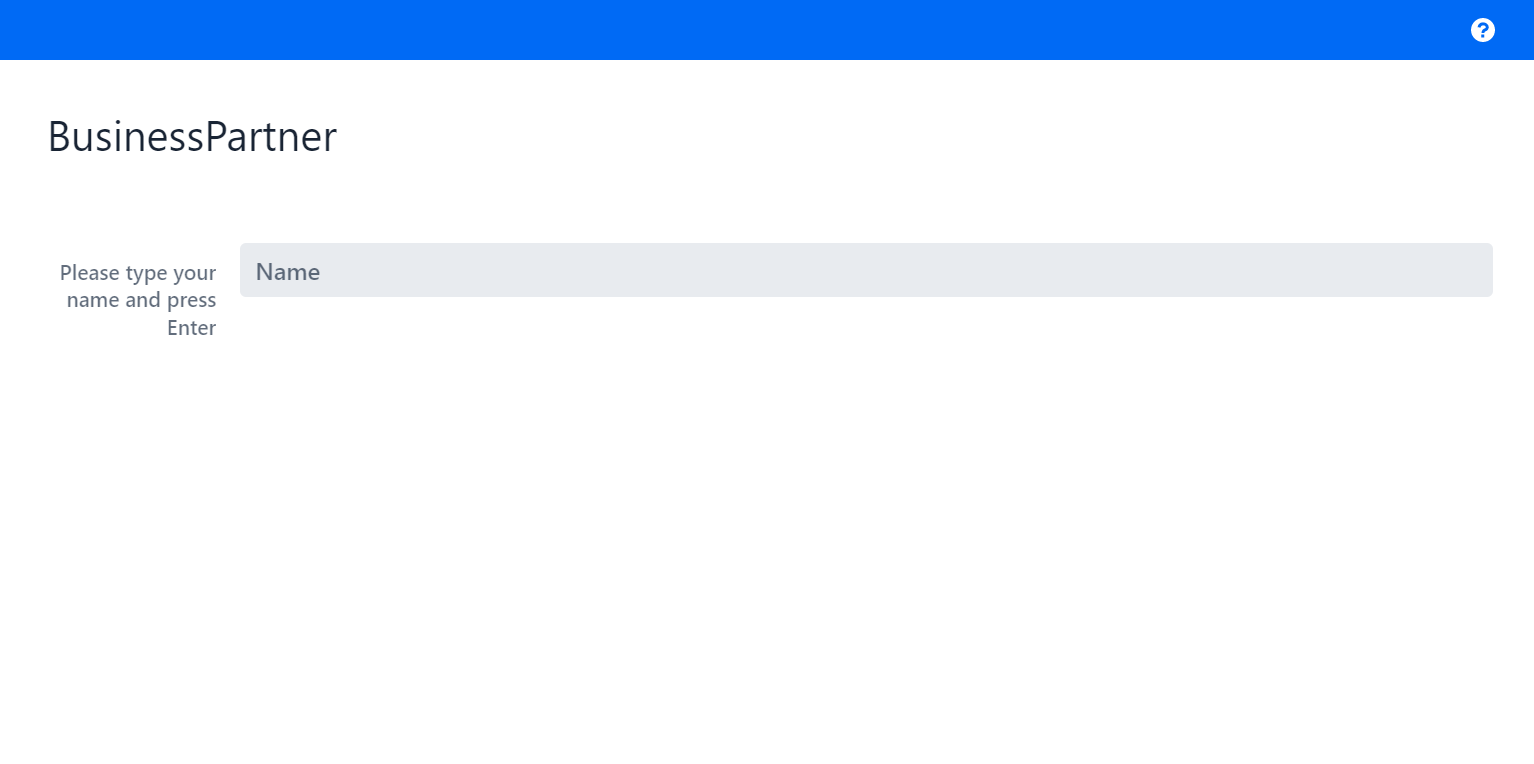
Figure 5. linkki example application
Getting ready
Now that you have the basic frame of a linkki web application using Spring Boot, you are almost done with the initial project setup. Before you move on:
-
You rename
BusinessPartnertoBusinessPartnerApplication, in order to avoid confusion between class names later -
You remove some elements of the example application:
-
The classes
HelloPmoandBusinessPartnerPageare not needed and thus can be deleted. You will build your own UI classes. -
You switch to the
BusinessPartnerViewand delete its constructor.
-
You also need to include the domain model. To do that, you simply add the dependency sample-model in the pom.xml.
<dependency>
	<groupId>org.linkki-framework.tutorial</groupId>
	<artifactId>sample-model</artifactId>
	<version>2.5.1</version>
</dependency>
This project includes the model classes BusinessPartner and Address describing a business partner. The Validation class completes the model by providing validation functionality.
The model project also provides an interface BusinessPartnerRepository with a default implementation InMemoryBusinessPartnerRepository that stores business partners.
You have to provide an instance of this repository as a Java Bean, so that the Spring framework can inject it where you need it later. You can accomplish this by adding a createBusinessPartnerRepository method to your Application class and marking it with the Spring @Bean annotation.
BusinessPartnerApplication.java
    @Bean
    public BusinessPartnerRepository createBusinessPartnerRepository() {
        return InMemoryBusinessPartnerRepository.newSampleRepository();
    }
Now the initial project setup is done. If you run the application now, you get an almost empty browser window. All you can see is a blue menu bar on the top of the window with a little question mark on it. This opens a dialog that contains some basic application information that can be configured in the BusinessPartnerConfig.

Figure 6. Empty linkki application
Let’s begin with the step-by-step tutorial.